
Unique Jurassic Park III Model Diorama Takes Shape
Working on a Prehistoric Landscape (Jurassic Park III)
Talented model maker and prehistoric animal model fan, Robert Townsend has embarked on an ambitious project to build a large prehistoric diorama, a project he has named “Jurassic Park III”. Team members at Everything Dinosaur have been lucky enough to have received regular updates as the model begins to take shape. The baseboard is made from a two-metre-long door blank, as with all projects such as this, a lot of planning and preparation has been undertaken before the construction phase can begin.
The Baseboard Accurately Marked Out

The dinosaur diorama base with the grid carefully inked in.
Picture credit: Robert Townsend
Creating a Prehistoric Diorama
Once Robert had finalised his design plans it was time to mark out the baseboard using an accurate scale so that the model can commence its transformation from the drawing board to three-dimensional reality.
The base was accurately marked out using a pen and a ruler into six inch squares. This would enable the shapes of land formations and other features to be plotted onto the base. Using this grid as a guide, Robert was then able to pencil in the various contours and features that he wanted. A ruler was used for straight lines and a bendy plastic guide for curved areas. Time and care taken at this stage would ensure that the finished landscape would look realistic.
Cladding the Prehistoric Landscape in Newspaper
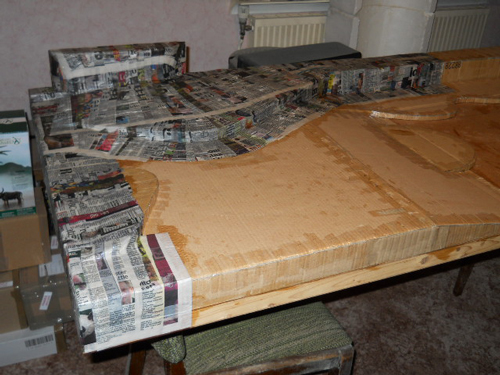
Building up the features on the prehistoric landscape.
Picture credit: Robert Townsend
Constructing the Landscape
After the model maker had built up a large collection of sturdy cardboard, landscape construction was begun. The background and rear areas are normally the highest land formations, so these were built first, enabling the diorama to have an obvious “rear” and “front” to it. Working to the nearest 1/16 of an inch, each piece of cardboard was measured accurately and then carefully glued into position. When viewed from underneath, Robert describes these sections as “looking like giant, odd-shaped Lego bricks.”
The left-hand edge of the Jurassic Park III landscape has been made to exactly match the right-hand edge of Robert’s earlier, large-scale dinosaur diorama. This will enable him to display them both together, should the need arise. The entire model was then clad in layers of newspaper to help define the landscape features and in preparation for painting. Extra strength wallpaper paste was used to ensure all the paper stays in place.
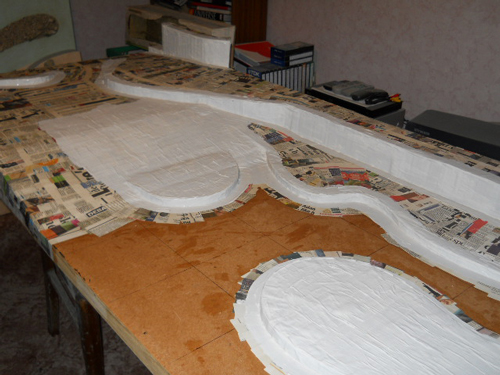
A Waterhole Centrepiece
The central feature of the prehistoric landscape will be a substantial waterhole, a place for the various prehistoric animals that will feature in the diorama, to drink.
Robert explained:
“My original design was to have just a small ‘duck pond’ type feature with some small water plants growing around its’ edges, but when I saw the size of the three palm tree figures and the 12-inch Cycad tree model made by CollectA, (which I recently bought from Everything Dinosaur), it was obvious that this was far too small a feature with not enough shoreline for lots of exotic plants and drinking animals. So, I re-drew it about four times larger and this was definitely the right thing to do. It will dominate the entire middle third of the diorama, as I think it should.”
To view the range of prehistoric plants and prehistoric animals in the CollectA model range: CollectA Prehistoric Plant Models and Prehistoric Animal Figures.
The Landscape Clad in Newspaper
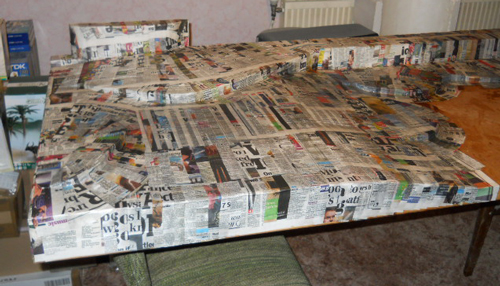
The cardboard is covered in paper ready for painting.
Picture credit: Robert Townsend
The Model Water Feature
The waterhole will make a natural centrepiece to the diorama and it will represent the lowest lying area of the landscape. Producing a realistic water effect can be difficult, but a trip to a railway modelling shop enabled resourceful Mr Townsend to acquire a small jar of “model water feature”. He has not used this substance before and care needs to be taken when brushing this material on, but there is still a lot to do before the water feature can be brought to life.
Applying the Undercoat to the Prehistoric Landscape
Painting the undercoat on the dinosaur diorama.
Picture credit: Robert Townsend
Applying the Dinosaur Diorama Undercoat
The entire surface, excluding the central waterhole feature was painted with a pale grey masonry paint. Two undercoats of this water-based emulsion were applied. The aim was to smooth out and cover wrinkles, creases and imperfections in the newspaper cladding. This renders the entire surface smooth and creates a solid looking piece of landscape. Having two coats of paint, (and in some places three), makes for great strength and long lasting surfaces.
After a good 24-hours to allow the undercoating to dry fully, all the vertical rock faces were painted with a second coat of masonry paint, only this time, a brownish-clay colour was selected. Robert recommends allowing at least a day to let the paint dry completely.
Painting the Edges of the Prehistoric Landscape

Painting the black edging along the sides of the model.
Picture credit: Robert Townsend
Painting the Model Landscape
The next stage saw the upper surfaces painted with a sandstone colour and a couple of coats of a matt black paint was applied to the edges of the model to provide a professional looking finish to the sides of the landscape. In the picture above, the landscape with its central water feature can be seen to be really coming together. All Robert’s careful planning and preparation is beginning to pay off. Robert has promised to send us more photographs and updates on his dinosaur themed diorama. We look forward to seeing how this prehistoric scene looks when it is finished.
Robert enjoys creating prehistoric themed dioramas that show dinosaurs and other extinct creatures that lived during specific periods of the Mesozoic. Everything Dinosaur blog readers can view several of Robert’s prehistoric scenes:
A Late Cretaceous Dinosaur Diorama.
Our thanks to Robert for sending the prehistoric diorama pictures.
Vist Everything Dinosaur’s award-winning website: Everything Dinosaur Website.